How to Use ChatGPT Code Interpreter for Free – Beebom
Recently, OpenAI released Code Interpreter in ChatGPT for all paying users. However, it costs $20 per month, which is not affordable for everyone. So if you want to use ChatGPT Code Interpreter for free, this tutorial is for you. A developer who goes by the name of Shroominic has developed an open-source implementation of ChatGPT’s Code Interpreter. It allows you to perform dataset analysis and visualize data similar to ChatGPT. On that note, let’s go ahead and learn how to use Code Interpreter for free.
Things to Keep in Mind Before You Proceed Further
1. We are using the free and open-source Code Interpreter API project on GitHub (visit). It uses CodeBoxes, OpenAI’s API, LangChain Agents, and multiple Python packages to behave like ChatGPT’s Code Interpreter.
2. For a small dataset, it works pretty well and without any charge. However, when you throw a large dataset for analysis, OpenAI’s rate limit for free users prevents the operation. So if you plan to use it for large amounts of data, consider adding a payment method to your OpenAI account.
3. If you have access to the GPT-4 API, the project works well. However, I have customized the code to make it compatible with the GPT-3.5-turbo model as well.
Step 1: Set Up Code Interpreter API
Things to Keep in Mind Before You Proceed Further
1. We are using the free and open-source Code Interpreter API project on GitHub (visit). It uses CodeBoxes, OpenAI’s API, LangChain Agents, and multiple Python packages to behave like ChatGPT’s Code Interpreter.
2. For a small dataset, it works pretty well and without any charge. However, when you throw a large dataset for analysis, OpenAI’s rate limit for free users prevents the operation. So if you plan to use it for large amounts of data, consider adding a payment method to your OpenAI account.
3. If you have access to the GPT-4 API, the project works well. However, I have customized the code to make it compatible with the GPT-3.5-turbo model as well.
1. First, you need to install Python and Pip on your computer, for which you can follow our linked tutorial. Make sure to add python.exe to PATH during installation.

2. Once you have installed Python along with Pip, open the Terminal and run the below commands to check if they are set up properly. The commands should return output with their version numbers.
python --version pip --version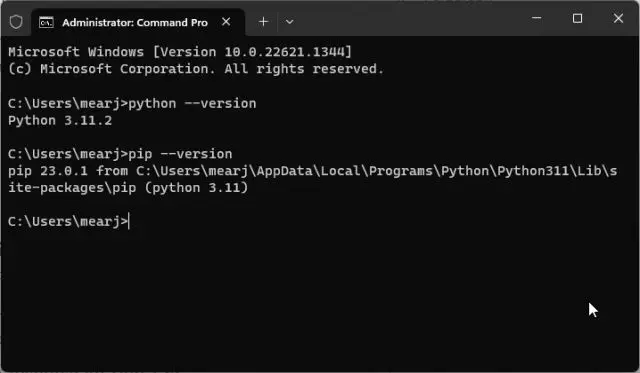
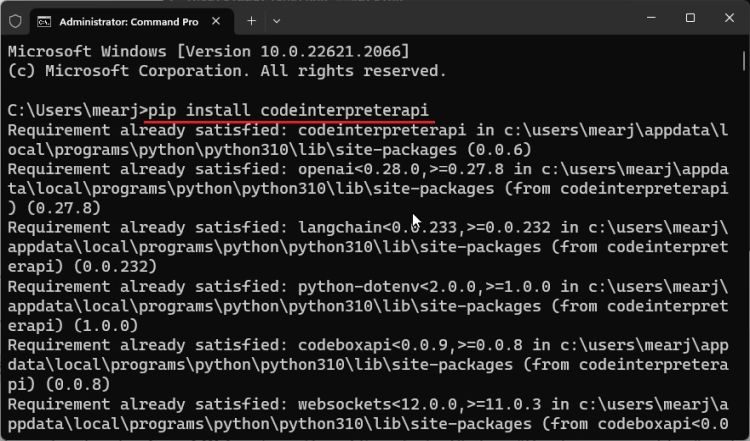
3. Now, run the below command to install the Code Interpreter API.
pip install "codeinterpreterapi[all]"
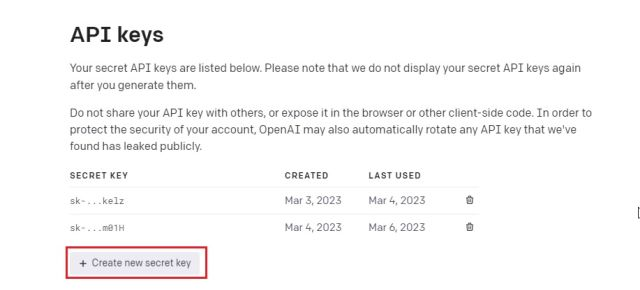
4. After that, go ahead and get an API key from OpenAI’s website. Click on “Create new secret key” and copy the key.
Step 2: Run ChatGPT Code Interpreter for Free
1. Once you do that, it’s time to run the Code Interpreter API for free.
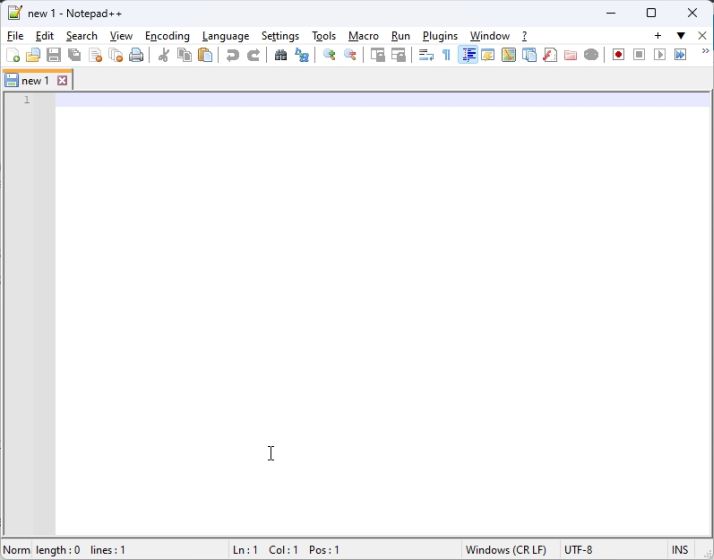
2. Open a code editor like Sublime Text or Notepad++ (Download).
3. Now, copy the below code and paste it into the code editor. The code is from the GitHub page of the Code Interpreter API, but I have made some changes to avoid some errors.
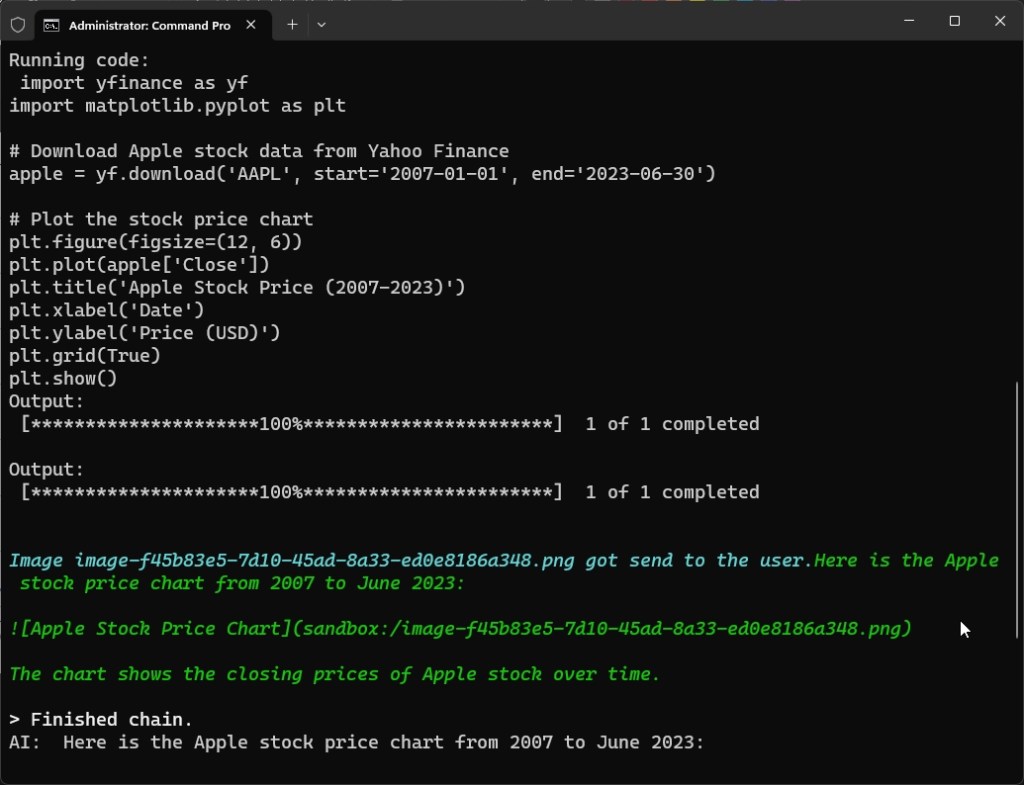
import os os.environ["OPENAI_API_KEY"] = "PASTE THE OPENAI API KEY HERE" from codeinterpreterapi import CodeInterpreterSession async def main(): # create a session session = CodeInterpreterSession(model="gpt-3.5-turbo") await session.astart() # generate a response based on user input response = await session.generate_response( "Plot the Apple stock price chart from 2007 to 2023 june" ) # output the response (text + image) print("AI: ", response.content) for file in response.files: file.show_image() # terminate the session await session.astop() if __name__ == "__main__": import asyncio # run the async function asyncio.run(main())
4. I have highlighted the code in red where some changes are needed. First, paste the OpenAI API key in the second line.
5. After that, if you have access to the GPT-4 API, you can define the “gpt-4” model in the ninth line. Finally, in the 14th line, you can enter your query and define what you want to create.
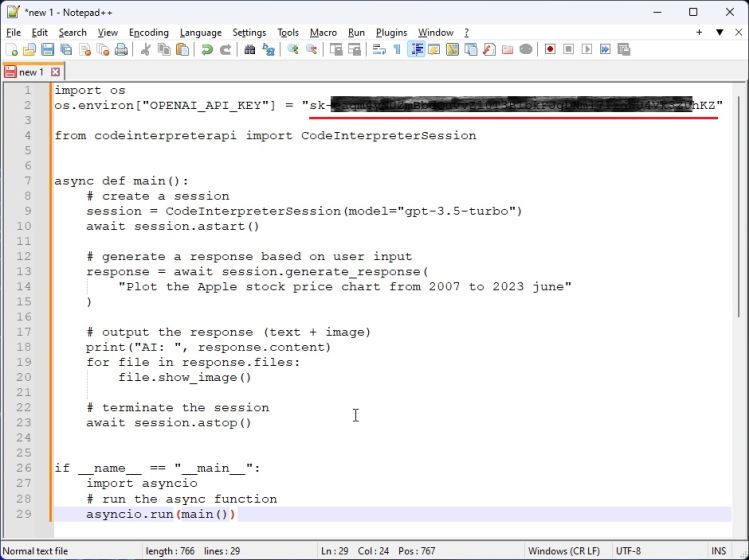
6. Now, save the file as “chart.py” to the Desktop. Make sure to add .py extension at the end.
7. Now, go ahead and open Terminal and run the below commands one by one. The first command will move to the Desktop location and the second one will execute the “chart.py” file using Python.
cd Desktop python chart.py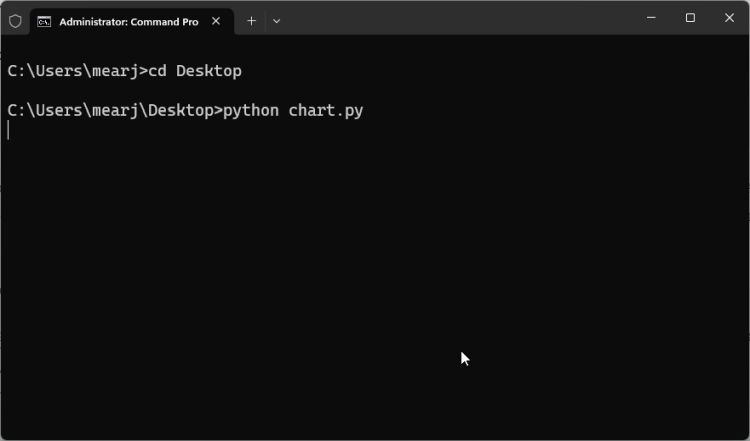
8. Give it a few seconds and Code Interpreter API will generate the chart for you.
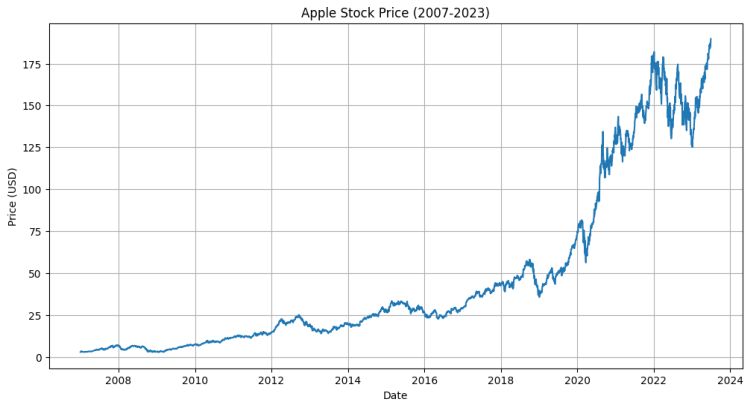
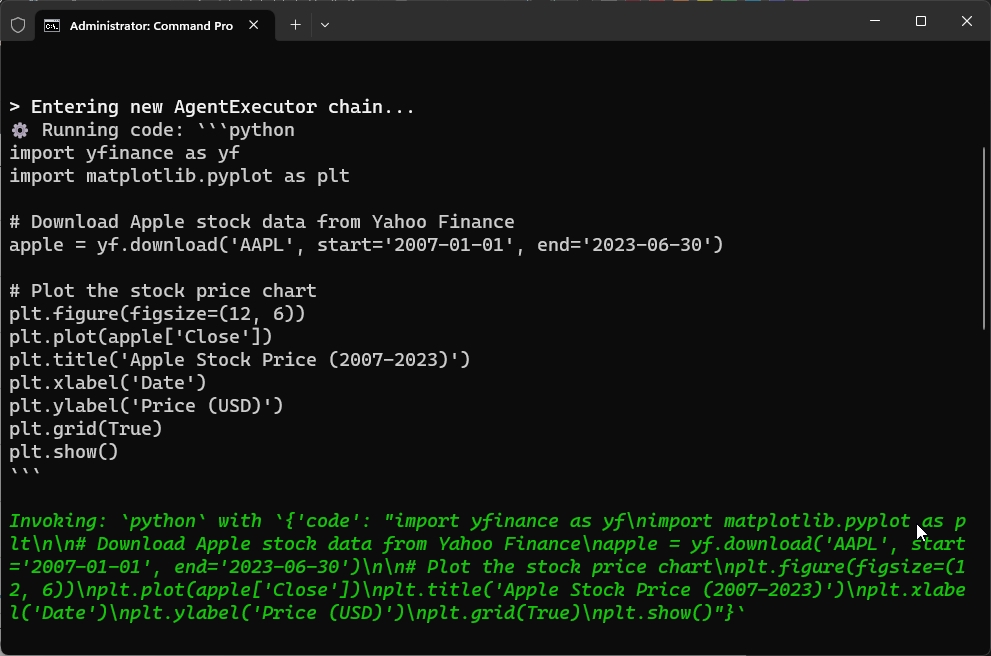
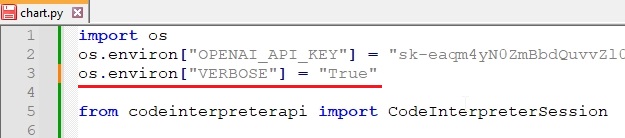
9. It uses a number of services in the background to achieve this result, including LangChain Agents, Yahoo Finance data from the internet, Matplotlib to plot the graph, and more. You can add the below line to the code to see everything happening in the background.
os.environ["VERBOSE"] = "True"
10. Now onwards, you can simply change the query in the code and execute the “chart.py” file again to generate new charts.

Step 3: Perform Data Analysis Using Code Interpreter API
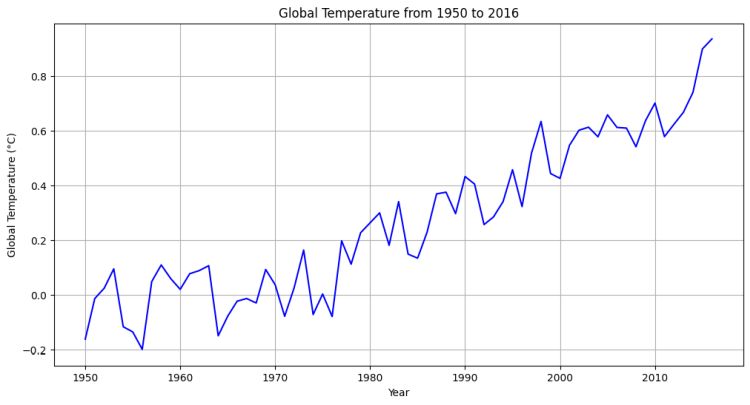
1. You can also use your local data to perform data analysis for free. For that, create a folder named “analysis” on the Desktop.
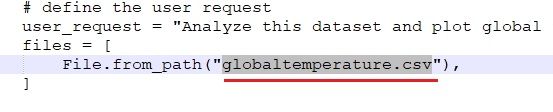
2. Now, move your dataset to the “analysis” folder. The dataset can be in CSV, XSL, or XSLX format. For example, we are going to use a “globaltemperature.csv” file inside the “analysis” folder.

3. Next, open the code editor and paste the below code.
import os os.environ["OPENAI_API_KEY"] = "PASTE THE OPENAI API KEY HERE" from codeinterpreterapi import CodeInterpreterSession, File async def main(): # context manager for auto start/stop of the session async with CodeInterpreterSession(model="gpt-3.5-turbo") as session: # define the user request user_request = "Analyze this dataset and plot global temperature from the year 1950 to 2016. Consider the GCAG system." files = [ File.from_path("globaltemperature.csv"), ] # generate the response response = await session.generate_response( user_request, files=files ) # output to the user print("AI: ", response.content) for file in response.files: file.show_image() if __name__ == "__main__": import asyncio asyncio.run(main())
4. Here, you first need to paste the OpenAI API key.
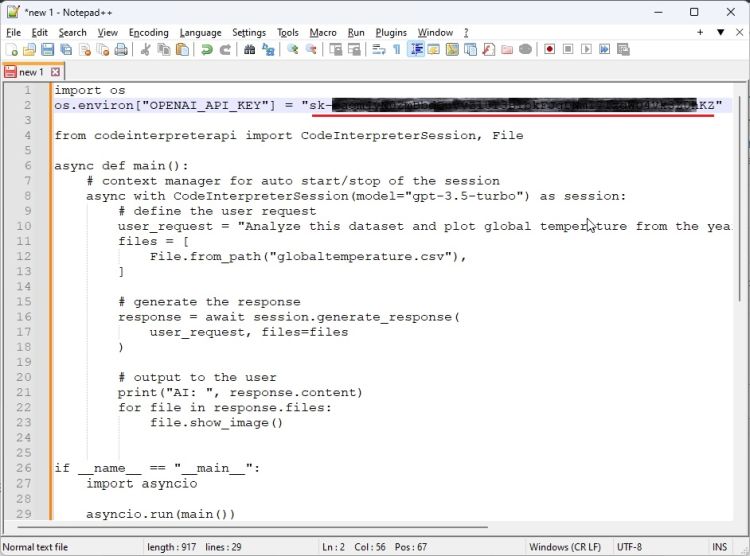
5. Now, change “globaltemperature.csv” with your own dataset name. By the way, you can also change the model and user query depending on what you want from the data.
6. Save it as “data.py” inside the “analysis” folder on your Desktop.
7. Launch the Terminal and run the file in a similar fashion.
cd Desktop/analysis python data.py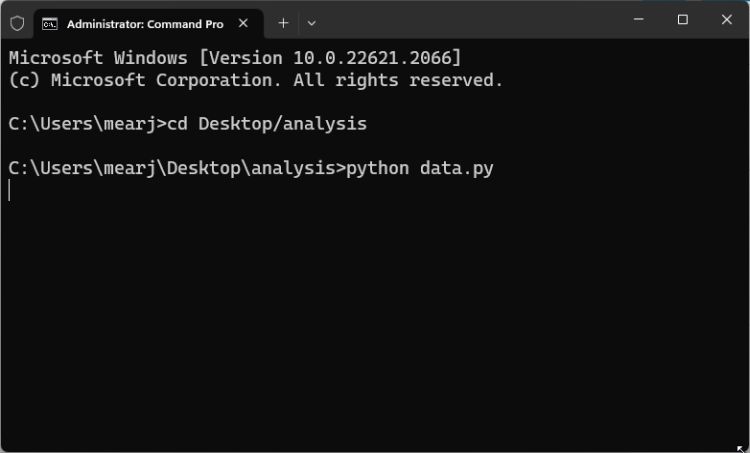
8. You will now get the chart based on your local dataset. And this is how you can use the Code Interpreter API for dataset analysis without paying any fee.


8 Comments
Lmao
It says use chatgpt for free
but pay for api key
session is not connecting, any thoughts why is this happening? Although I use the same openai_api_key in different applications and it is working fine.
Thanks for helpful blogpost and your response in advance!
Add this code and check for the specific error and report back.
os.environ[“VERBOSE”] = “True”
Thank you!
I’m getting this: “FileNotFoundError: [Errno 2] No such file or directory: ‘jupyter’
Unclosed client session
client_session: ”
I don’t get why it says FileNotFoundError since the file I want to run is called chart.py as in the tutorial. I’m using python3 though BBEdit on mac. Any ideal where did it go wrong?
I’m getting this error
Jupyter command `jupyter-kernelgateway` not found.
Waiting for kernel to start…
Waiting for kernel to start…
How can I fix this?
try running both the commands one by one
pip install jupyter_kernel_gateway
pip install codeinterpreterapi
great work- but it appears not to be completely for free.
I got this error:
Retrying langchain.chat_models.openai.acompletion_with_retry.._completion_with_retry in 2.0 seconds as it raised RateLimitError: You exceeded your current quota, please check your plan and billing details..
AI: Sorry, something went while generating your response.Please try again or restart the session.
So I assume I still have to upload funds so I am paying for each API call? I just don’t need the premium account?
This is because of the rate limit on free accounts. You can add a payment method to your account or start with a smaller dataset.
Venba has managed to turn a lot of heads since its first announcement at Nintendo Direct in late 2022. After all, you don’t get frequently games where you need to prepare South Indian cuisine throughout the experience. I gravitated toward […]
The much-anticipated Nothing Phone (2) is finally here, and it created a lot of buzz in the smartphone market. While the Nothing Phone (2) looks similar to its predecessor, it is still a wake-up call for the smartphone industry. One […]
Earlier this year, MSI updated their Titan, Vector, Stealth, Raider, and several other gaming laptop lineups. We have already reviewed the colossal MSI Titan GT77 HX 13V, and recently, we got our hands on the MSI Stealth 14 Studio A13V. […]
Lmao
It says use chatgpt for free
but pay for api key
session is not connecting, any thoughts why is this happening? Although I use the same openai_api_key in different applications and it is working fine.
Thanks for helpful blogpost and your response in advance!
Add this code and check for the specific error and report back.
os.environ[“VERBOSE”] = “True”
Thank you!
I’m getting this: “FileNotFoundError: [Errno 2] No such file or directory: ‘jupyter’
Unclosed client session
client_session: ”
I don’t get why it says FileNotFoundError since the file I want to run is called chart.py as in the tutorial. I’m using python3 though BBEdit on mac. Any ideal where did it go wrong?
I’m getting this error
Jupyter command `jupyter-kernelgateway` not found.
Waiting for kernel to start…
Waiting for kernel to start…
How can I fix this?
try running both the commands one by one
pip install jupyter_kernel_gateway
pip install codeinterpreterapi
great work- but it appears not to be completely for free.
I got this error:
Retrying langchain.chat_models.openai.acompletion_with_retry.._completion_with_retry in 2.0 seconds as it raised RateLimitError: You exceeded your current quota, please check your plan and billing details..
AI: Sorry, something went while generating your response.Please try again or restart the session.
So I assume I still have to upload funds so I am paying for each API call? I just don’t need the premium account?
This is because of the rate limit on free accounts. You can add a payment method to your account or start with a smaller dataset.